Booting Windows from an External USB Device on a Mac
May 13, 2018
If you try booting the Windows 10 Setup on a Mac and installing to an external drive results in the error “Windows cannot be installed to this disk. Setup does not support configuration of or installation to disks connected through a USB or IEEE 1394 port.” There is lots of mis-information on the internet that says you cannot install Windows to an external drive and then boot that drive on a Mac. This is false. I’ve done it with Windows 10 on my 27” 2010 iMac and also on my 27” 2017 iMac.
I thought it was time for a write up on how to achieve this.
Requirements
- A Windows 10 License
- Some sort of external USB Boot Device
- On my 2010 iMac I did it with a USB 2.0 HDD dock. It was painfully slow, but it worked.
- On my 2017 iMac I used a USB-C 3.1 to M.2 adapter with an SSD.
- Access to a Windows machine (I used my Parallels VM)
- WinToUSB a free utility as long as it’s not for commercial use
Read this whole document before you start.
Setup the New Boot Drive
Take the USB device you want to boot Windows with and mount it on a Windows machine. Launch the Disk Management tool — search for “Windows Create and Format Disk Partitions.
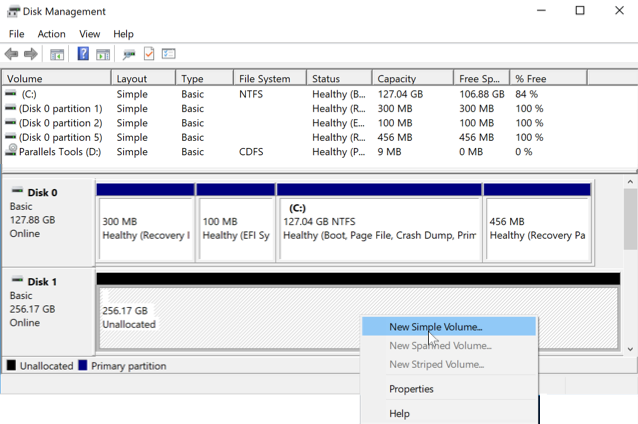
Before continuing, make absolutely certain you’re looking at the correct device in Disk Management. It’s easy to pick the wrong thing and destroy all your data. Chances are your primary drive will show up as Disk 0 and your USB drive will be Disk 1.
Once you’ve identified the right drive, right-click on the disk in the UI and make a partition. This is going to be the EFI partition. It needs to be at least 100MB and formatted as FAT32. The last time I did this, I wrote a note that said to make it 101MB to account for rounding. That note doesn’t seem accurate to me now, but it’s only 1MB, so make your partition 101MB. It doesn’t matter what you name the partition, but I chose “WindowsEFI.” Make sure that you do not assign a drive path.

Right-click on the remaining unpartitioned space and fill the rest of it up with a NFTS partition. Again, it doesn’t matter what you name the partition, but I named mine “Windows.” Just like the last partition, there’s no need to assign a drive path.

When you're done, your device partitions should look like this.
Installing Windows
To get Windows on the new boot device, you’ll need a Windows 10 disc image in ISO format. Microsoft allows you to download one from this website. Hopefully this is obvious to you, but you’re going to want the 64-bit version. However you decide to download the ISO, remember that it needs to be accessible from your Windows machine later on.
If you’re having problems finding the ISO downloads, it could be because the Windows download site examines your web browser’s user-agent and steers you into Microsoft’s Media Creation Tool if you’re on a Windows machine. Other OSes are presented with download options for Windows 10 ISOs. Any modern browser will let you spoof your user-agent using the developer tools.
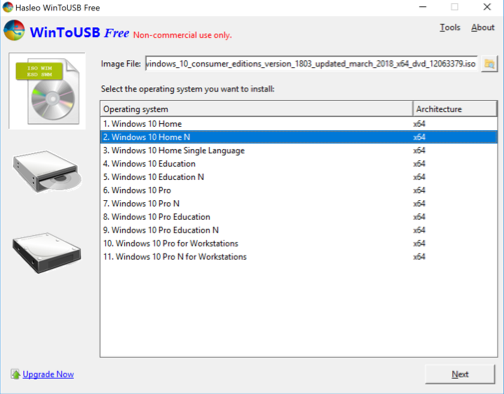
Now download and install the WinToUSB utility and launch it. In the UI, you’ll have to browse the Windows 10 ISO you obtained earlier. From what I’ve seen Windows ISOs will let you install any of the Windows 10 Editions. WinToUSB does most of the installing for you so it will prompt you for the edition your going to install. Pick the one that’s correct for your Windows 10 license.
Eventually, you’ll be prompted to select your partitions. WinToUSB is a little unclear about what this means, but the small FAT32, EFI partition you created earlier should be the system partition and the larger NTFS is the boot partition. Jump through the rest of the hoops and wait for WinToUSB to do its thing.
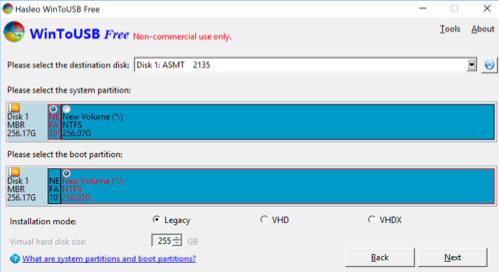
WinToUSB should look something like this in the device setup process.
Windows Drivers
Mac hardware doesn’t readily have Windows drivers available from the normal Windows download channels like Intel, AMD, etc. For the best experience, you’ll have to get the drivers from Apple into Windows.
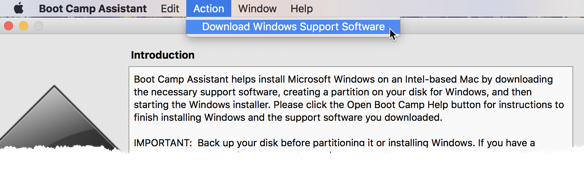
On your Mac, launch the Boot Camp Assistant — search for it, or look under Applications > Utilities. When it launches don’t click on anything in the UI. Go up to the menu bar and pick Action > Download Windows Support Software. Save it somewhere you’ll be able to get to it from Windows, like a different USB device or network drive. When the download is done, you’ll find that you have a folder named “Windows Support.” All the drivers we need are in here.
Boot Into Windows
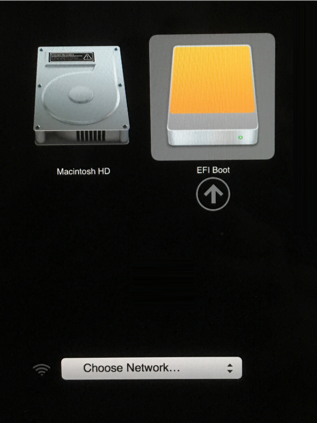
Restart your Mac and hold down the Option key. This brings up a device boot menu. I don’t have too hard of a time doing this on my 2017 iMac, but it was a real pain in the ass to get the timing right on my old 2010 and it often took several reboots. If you get it right, you’ll be presented with potential boot devices. Pick your new Windows install.
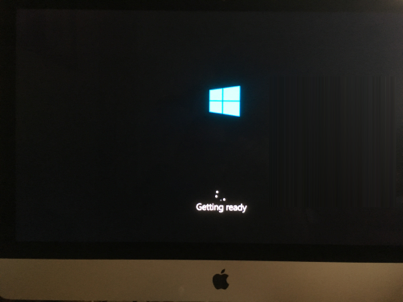
The first time you start you have to walk through the remaining Windows setup steps. Keep in mind that Windows might want to restart as part of this process. Anytime that Windows reboots, you’re going to have to hold down the Option key and select the Windows boot device.
After you’ve created your account and are finally in Windows, you’ll want to install the drivers. Copy the “WindowsSupport” folder off of your USB device on to the Windows machine. Run WindowsSupport > BootCamp > Setup.exe. This will install all the drivers. Be careful because my Windows stopped and rebooted at some point during this process. I think it was because the Boot Camp installer updated the USB drivers and my USB boot device was unmounted in the process. I had to run the Setup two times in order to get all the drivers properly installed.
Once it is installed and you’ve restarted, launch the Apple Boot Camp software from the Windows start menu and check for updates. There are probably newer video drivers than you’re using and you’ll want those.
You can stop here if you want and enjoy windows.
Sharing Files Between Windows and Mac
If you want to share files between Windows and macOS, the easiest thing to do is make a FAT32 partition on your Mac, on your new USB boot device, or on another USB device attached to your Mac. There are paid utilities that will allow macOS to read or write to NTFS partitions, but I feel as though they’re kinda pricy for what you get. Still, it’s an option.
Prevent Windows Drives from Mounting in macOS
If you’re like me, you’ll just have your new external boot device plugged in all the time. macOS auto mounts whatever it can when it boots, and I have no reason for these Windows drives (the EFI and the Windows partition) to be visible to macOS. I just edited fstab on macOS to prevent them from auto mounting. There are already lots of guides on how to do this so I’m not going to duplicate their efforts. Here’s a decent guide: https://discussions.apple.com/docs/DOC-7942